Beginner’s Guide to Candle Making: Step-by-Step Tutorial
There’s something magical about lighting a handmade candle — especially when you’ve created the scent yourself. Whether you’re starting a new hobby, creating gifts, or just adding ambiance to your home, candle making is a wonderfully creative and satisfying craft.
At Elementary & Co Apothecary, we believe in natural, soulful living — and that starts with knowing what’s in the products you use. This beginner-friendly guide will walk you through making your first candle, using simple ingredients from our shop.
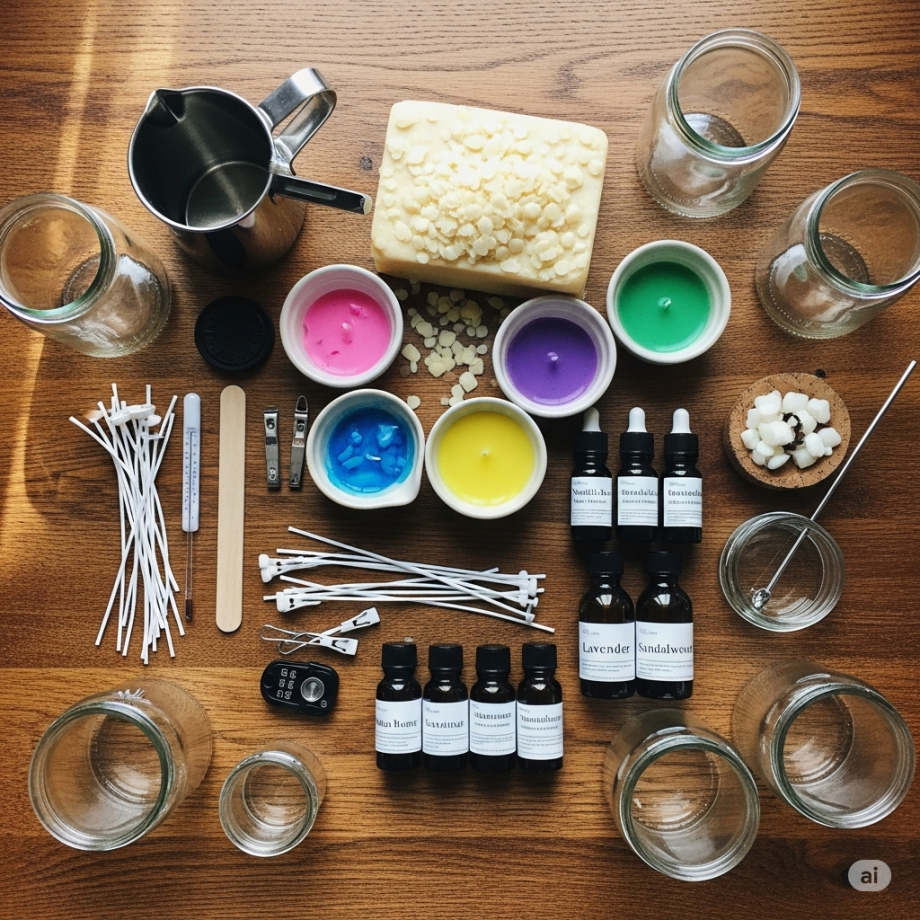
What You’ll Need
You can find all of these in-store or online at elementaryshop.co.za:
- Wax – Soy wax is a great beginner choice (clean-burning & easy to work with)
- Fragrance oil – Choose your scent (popular beginner picks: lavender, vanilla, mango)
- Wick – We stock a variety of wick sizes to suit different containers
- Candle container – Glass jar, tin, or ceramic cup (ensure it’s heat-safe)
- Wick holder or peg – To keep your wick upright while pouring
- Double boiler or heat-safe jug + pot
- Thermometer (optional but helpful)
Step-by-Step: Make Your First Candle
Step 1: Prepare Your Workspace
Cover surfaces with newspaper or wax paper — wax can get messy! Lay out all your materials.
Step 2: Measure Your Wax
Use a kitchen scale. A good rule of thumb: double the volume of your container (wax shrinks as it cools).
Step 3: Melt the Wax
Use a double boiler (or place your wax in a heat-safe jug inside a pot of simmering water). Stir gently until melted.
Pro Tip: Soy wax melts around 76–85°C. Overheating can affect scent throw and texture.
Step 4: Add Your Fragrance Oil
Once the wax is melted and cooled slightly (around 65–70°C), stir in your fragrance oil. Use 6–10% fragrance oil per wax weight.
Step 5: Secure the Wick
Place your wick in the center of the container. Use a wick holder or peg to hold it upright.
Step 6: Pour the Wax
Slowly pour your scented wax into the container, leaving about 1cm space at the top. Be gentle to avoid bubbles.
Step 7: Let It Set
Allow the candle to cool and set undisturbed for several hours (ideally overnight).
Step 8: Trim the Wick
Once the candle is fully set, trim the wick to about 0.5–1cm above the surface.
Make It Your Own
Once you’ve mastered the basics, try:
- Layering scents or colours
- Adding dried herbs like lavender or rose petals (just a pinch)
- Using natural dyes to tint your wax
We stock micas, botanicals, fragrance oils, and reusable jars to fuel your creativity.
Candle Safety Tips
- Always burn candles on a heatproof surface
- Never leave a burning candle unattended
- Don’t overload with botanicals or oils — keep your candle safe and clean-burning
Ready to Start?
Shop all your candle-making needs — soy wax, wicks, jars, fragrance oils, tools and more — online at
👉 elementaryshop.co.za
Or visit us in-store in Pietermaritzburg, Howick, Randburg or Salt Rock!

